Showing posts with label Art. Show all posts

Wednesday, January 28, 2015

Valentine's Day Craft Idea!

Well January has come to a close and February is just around the corner. Wow! We wanted to give a some fun Valentine's Day craft ideas over the next few weeks to inspire some creativity for you and your children. 
When I was little, I was fascinated with melting crayons and making crafts out of the wax. I have done this craft in the past, but a step by step guide is on Martha Stewart's website too. How gorgeous are these hearts? It's also a great craft to do as a family as each person can customize their shape, colors and design. The possibilities are endless! 
All you need is:
- Wax paper
- Wax crayons of various colors 
- Handheld pencil sharpener
- Iron
- Craft paper 
- Scissors
- Yarn, thread, twine etc. (to hang the hearts) 
To see the how to make these beautiful and easy decorations click HERE 

Wednesday, November 5, 2014

Fall & Thanksgiving Crafts For Kids!

Well October has come and gone and the holidays are approaching faster than you can imagine! Here are two great crafts to do with your little ones, now that it gets dark at 5:00 thanks to daylight savings, there's a lot more indoor time!
First we have these adorable leaves that are SO simple and would make great Thanksgiving table decorations! 
Paper Leaves
  • 9x12 inch sheets of construction paper: red, yellow, orange (one sheet for each leaf)
  • Acrylic paints: yellow, orange, red, rust
  • Paintbrush
  • Pencil
  • Tracing paper
  • Scissors
  • Double-sided adhesive tape
  • Chenille stems: light brown, yellow, orange
  1. Print the leaf pattern.
  2. Paint the pieces of paper with a brush damp with paint, making different-size strokes across the front and back of the paper; let dry.
  3. Make a 1/2-inch-wide fold along one long edge of paper; press a sharp crease to fold. Fold the rest of the paper like a fan (folds should run parallel to 1/2-inch fold). Fold in half crosswise, matching the short edges.
  4. Trace the leaf pattern onto tracing paper; cut out. Place pattern on top of folded paper, trace, and cut out.
  5. Open the paper and refold all long fan creases. Refold in half crosswise, securing the ends in the center with tape.
  6. Thread one chenille stem through the middle opening at the fold for the stem. Fold the end of the chenille stem over and twist to make sure it stays attached. Curl the other end of the chenille stem as shown in the photo.
Flower Turkeys! Thanks to ~Our Best Bites
  • Artificial flowers in Thanksgiving colors
  • Hot glue gun
  • Scissors 
  • Brown/black/orange felt
  • Google eyes 
  1. First pull the flower off of the stem.  Then grab the center of the flower (that little brown part) and pop it right out.  It should just be attached to the green backing on the other side and they pop out pretty easily.
  2. Now you’ll see that each flower has several layers of petals, just separate them all.  These are all from that one flower:
3. Now take those layers of petals and mix them up and stack them, biggest to smallest. 
4. Then grab a pair of scissors and cut your petal pile right in half.  Take a hot glue gun and put a small dab of glue between each layer so they stick together just like that.
5. While those are drying, cut some turkey shapes out of brown felt.   I just free-handed mine, so they’re all a little different.  But c’mon, what turkey family all looks alike?
6. Then just glue your little turkey guy right onto the petals.
7. The only other thing you need is to glue on a tiny little orange felt triangle for a beak and googly eyes if you want.  They look cute without eyes too.  Googly eyes instantly make anything you put them on appear deranged.
8. And you're done! What can you do with these cute little creatures?! 
 
Enjoy!! Happy November :) 

Wednesday, October 22, 2014

Tie Dye Technique With SHARPIES?!

We can't WAIT to try this one out :)
Super simple craft that would make a great gift too. Check out the full post HERE
Here is what you need to create this fun craft:
  • a plastic vinegar jug
  • Sharpie Fine-Tip Permanent Markers
  • rubbing alcohol
  • spray varnish
  • medicine dropper or pipette
  • ribbon, twine or cording
  • button
  • scissors, hole punch 

Cut out your bookmark:

To remove the label from the vinegar jug, I filled the jug with very hot water, and let it sit for 10 minutes.  The heat from the water softens the glue, and the label peels off easily.
To make our bookmarks, I traced one of my own bookmarks on the plastic with a pencil, and used a pair of sharp scissors to cut it out. I repeated the process, getting 4 bookmarks out of one vinegar jug.

Color your bookmark:

Next, we colored our bookmarks.  Using a variety of bright colors, cover your entire bookmark with your Sharpies.  There’s no right or wrong way to do this.  Just fill in the whole bookmark.

The Sharpie and rubbing alcohol tie-dye technique:

Fill a dropper/pipette with rubbing alcohol and drip small drops on to your bookmark.  You can tap your dropper against your bookmark – that will deposit tiny amounts  on to the plastic, or you can just drip the alcohol randomly over your art.
Then let it sit.  Do not move the bookmark, or tip it, or all of your colors will run together.  Just watch it, and you’ll see the colors start to blend and fuse together.  It’s so magical and beautiful.
You can experiment with the amount of alcohol you use.  If you’re not happy with the way things are going, you can swipe the bookmark clean and start again.  A paper towel is good for this.

Setting the color:

To prevent your Sharpie art from rubbing off, you need to give it a shot of spray varnish.  Do not brush on a liquid varnish as it will likely dissolve your art.
Lightly spray your bookmark with the varnish.  If you use too much, it will activate the Sharpie ink like the alcohol did, and your colors will start to bleed again.
Allow your varnish to dry, and spray with a second coat if you like.  You don’t have to be quite as careful with your second coat of varnish because your art has been protected by the first coat.
Once your varnish has dried, punch a hole in the top of your bookmark, thread a ribbon or some cording through, and if you like, embellish with a pretty button.

Wednesday, September 24, 2014

Creative Crafts With Cardboard Tubes!

We all know they are everywhere! So, why not make a creative use out of them? Parents are always looking to use regular household products to create inexpensive, fun and entertaining projects for their children. Thanks to our good friends over at Happy Hooligans we have found this list of 22 ways to use these otherwise disposable products! 

22 Things to Make with Cardboard Tubes:

Click on the highlighted descriptions to see a full tutorial for each craft or activity.

fall crafts with cardboard rollsFall Decorations with Cardboard Tubes:

Use a cool paint process to make some fall napkin rings.
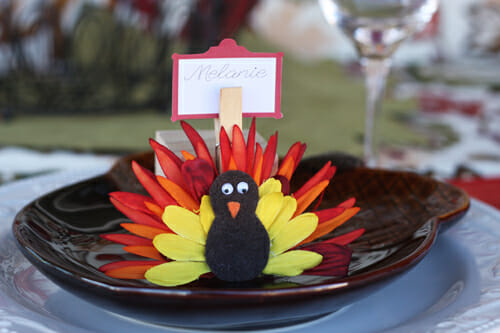
Make a turkey table topper for your Thanksgiving table.
Round up some fabric scraps and a few crafty odds and ends for some adorable toilet roll owls.

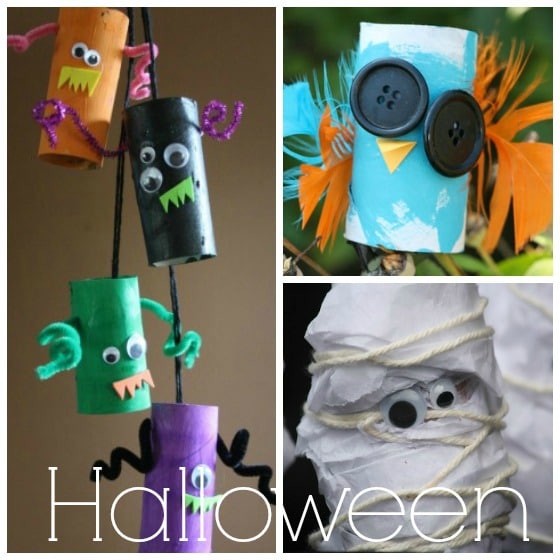
halloween crafts with cardboard tubesCrafting for Halloween:

The kids will love making a quirky monster mobile out of cardboard rolls.
spooky crow or owl is a very fitting decoration for Halloween.
Our toilet roll mummies help little ones develop their winding and wrapping skills.

toilet roll snowmenWinter Toilet Roll Crafts:

These cardboard roll snowmen are just the cutest little things, aren’t they?

cardboard roll nativity scene
The hooligans LOVE playing with our toilet roll Nativity set.

Christmas crafts toilet rollsCardboard Roll Christmas Crafts:

Fleece, batting and a cardboard roll makes an adorable Santa Claus.
Make a set of cute reindeer ornaments for your Christmas tree.
toilet roll ornament
This snowman ornament would be great for the tree or as a gift topper.

Spring Crafts with cardboard rollsSpring Crafts:

Summons up some April showers with a colourful rain stick.
These Easter chicks in paper nests are just too sweet.
Peeps!  Everyone loves Easter peeps, right?
And don’t forget about the Easter bunnies!  Check out our paint chip bunting too!

Toilet roll cuffs and cardboard roll braceletsBracelets and Cuffs:

Make some simple toilet roll cuff bracelets.
Anklets can be made using cardboard rolls and colourful duct tape.

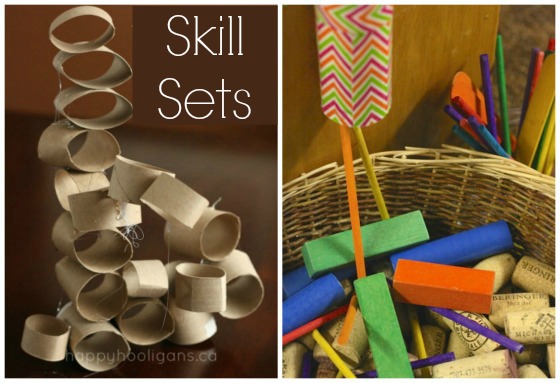
DIY activities with cardboard tubesSkill Building Activities:

Make some cool 3-D structures with tubes and a low-temp glue gun.
Toddlers love to drop things through our cardboard Drop Zone.

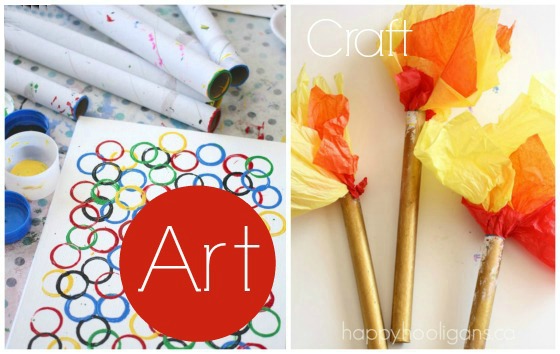
cardboard roll painting and torchArts and Crafts:

Create a unique piece of art for a kid’s room, toy room or classroom.
Turn a long cardboard tube into a torch.

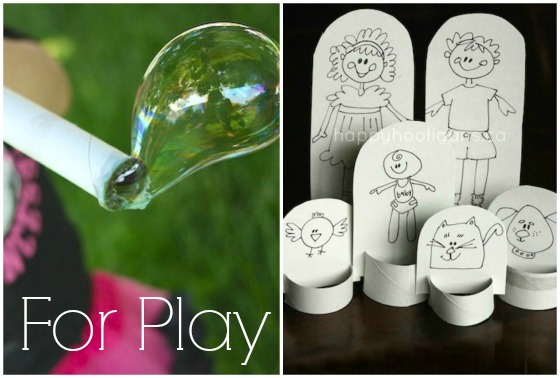
Bubble blower and paper dolls made with toilet roll tubesCardboard Tubes for Play:

In a pinch, a sturdy kitchen roll, makes an excellent bubble wand.
Make a set of simple “stand up” paper dolls.
Well?  What do you think?  Did we inspire you?  Now, it’s your turn to inspire me!  If you have a favourite cardboard roll craft or activity, I’d love to hear about it!
Now, I’ll bet you’re wondering how you can re-use all those Keurig K-cups you have stashed too!  Don’t worry!  We’ve got you covered: 25 Ways to Re-use Your K-cup pods.

SHARE THIS

Bookmark and Share